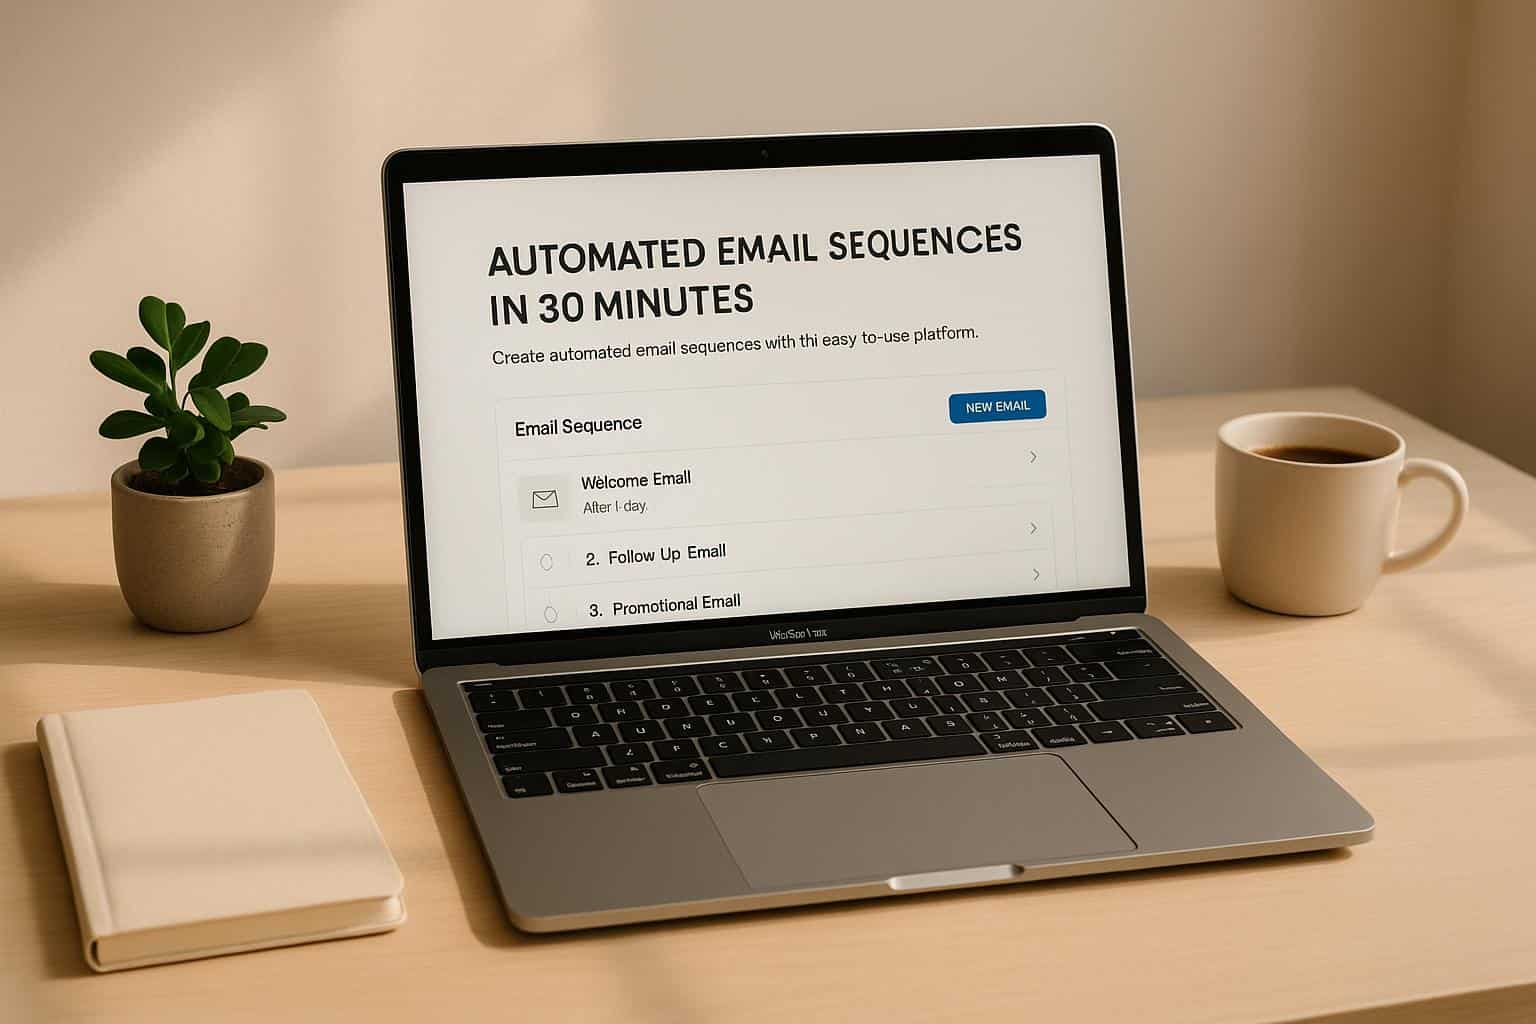
An Automated email sequence save you time and effort by delivering the right message to the right person at the right moment – without manual work. This guide breaks down the process into five simple steps you can complete in half an hour:
- Choose the Right Platform: Pick an easy-to-use tool like Mailchimp, ActiveCampaign, or ConvertKit. Focus on features like drag-and-drop builders, pre-built templates, and analytics.
- Set Up Triggers: Define actions that kick off your sequence, such as signups, purchases, or abandoned carts.
- Plan Your Email Flow: Map out a logical sequence of 3-7 emails. Space them out to keep subscribers engaged without overwhelming them.
- Write Effective Emails: Use clear subject lines, concise content, and strong calls-to-action. Personalize messages to make them relevant.
- Test and Launch: Test every step, from triggers to email formatting, on desktop and mobile. Fix any issues before activating your sequence.
ConvertKit Automated Email Sequence Tutorial For Beginners 2025 (Step By Step)
Step 1: Choose the Right Automation Platform
The first step to setting up your email automation in just 30 minutes is picking the right platform. Your choice here is crucial – get it right, and the process becomes a breeze. Choose poorly, and you’ll waste time wrestling with clunky features instead of focusing on crafting messages that truly connect with your audience.
Thankfully, modern no-code platforms have made email automation accessible to everyone. You don’t need to be a programmer or have a technical background. These tools often feature drag-and-drop interfaces and visual workflows, making it simple to build automations – even if it’s your first time.
When deciding on a platform, think beyond your immediate needs. Consider how it will handle growth. A tool that works for 100 subscribers today should still work seamlessly when you hit 10,000 subscribers down the line. This forward-thinking approach will save you from the hassle of switching platforms later.
Key Features to Look For in an Automation Tool
To set up your email automation quickly and effectively, look for these essential features:
- Drag-and-drop workflow builders: These allow you to visually map out your email sequences by connecting steps with arrows and boxes. It’s a simple way to add emails, set delays, and create branches – all without writing a single line of code.
- Pre-built templates: Templates for common workflows like welcome emails, cart recovery, or post-purchase follow-ups can save you tons of time. Just customize them with your content and branding, and you’re good to go.
- Conditional logic and segmentation: A good platform should let you send tailored emails based on subscriber behavior, preferences, or demographics. For instance, you could send one email to first-time buyers and another to loyal customers.
- Seamless integrations: Your email tool should connect effortlessly with your website, e-commerce store, CRM, or other tools you’re already using. Native integrations are ideal, as they minimize data sync issues compared to third-party connectors.
- Analytics and reporting: You’ll want clear insights into your performance. Look for tools that provide key metrics like open rates, click rates, and conversion tracking in easy-to-read dashboards.
- Mobile-responsive design: Since many people check their emails on their phones, your platform should automatically optimize emails for all screen sizes or offer mobile-friendly templates.
Keeping these features in mind will help you choose a platform that fits your needs and sets you up for success.
Best Platforms for Quick Setup
Here are three popular platforms that balance ease of use with powerful features, perfect for getting started quickly:
Mailchimp
Mailchimp is known for its simplicity and speed. Its automation builder uses a timeline format that makes visualizing your sequences easy. With plenty of templates and integrations with most major website and e-commerce platforms, it’s a great choice for beginners. Plans start at $13/month for up to 500 contacts, making it budget-friendly for small businesses.
ActiveCampaign
If you’re looking for more advanced capabilities, ActiveCampaign delivers. Its visual automation builder resembles a flowchart, which makes even complex sequences easy to manage. It excels in conditional logic and behavioral triggers, allowing for highly personalized automations. Pricing starts at $39/month for up to 1,000 contacts.
ConvertKit
ConvertKit is tailored for creators and online businesses. Its tagging and segmentation features are particularly strong, and the interface is clean and intuitive. The visual automation builder is great for handling subscriber journeys with multiple paths. Plans begin at $25/month for up to 1,000 subscribers.
| Platform | Best For | Starting Price | Key Strengths | Setup Time |
|---|---|---|---|---|
| Mailchimp | Small businesses, beginners | $13/month | Ease of use, templates | 15-20 minutes |
| ActiveCampaign | Growing businesses | $39/month | Advanced automation, CRM tools | 20-25 minutes |
| ConvertKit | Content creators, courses | $25/month | Creator-focused features | 15-20 minutes |
Choose a platform that lets you dive into automation within minutes. If the setup feels overly complicated or takes longer than five minutes, it might be worth trying another tool. Most platforms offer free trials, so you can test them out and find the one that works best for you. Once you’ve made your pick, you’re ready to set up the triggers that will kick off your automated sequences.
Step 2: Set Up Triggers and Entry Points
Triggers are the backbone of email automation. They’re like invisible switches that activate your email sequences whenever a subscriber takes a specific action. Think of them as your 24/7 assistants, ensuring the right message reaches the right person at just the right time.
Setting these up correctly not only saves you hours of manual work but also ensures your emails are timely and relevant. For example, if someone abandons their cart at 2:00 AM, an automated email can go out immediately – no need for you to be awake. Similarly, when a new subscriber signs up on a Sunday, they’ll get their welcome email right away instead of waiting until Monday.
Common Triggers for Automated Sequences
The best triggers are tied to actions that show clear interest or intent. Here are some of the most effective ones:
- Form Submissions and Newsletter Signups
A welcome email triggered by a signup is a great way to start building engagement with new subscribers. - Purchase Behavior
After someone makes a purchase, follow-up emails like order confirmations, shipping updates, or requests for reviews can keep them engaged. Plus, re-engaging existing customers is much more cost-effective than acquiring new ones. - Abandoned Cart Recovery
When someone adds items to their cart but doesn’t check out, you can send reminders featuring product images, reviews, or even a discount to nudge them toward completing the purchase. - Website Activity
Triggers based on site behavior – like downloading a lead magnet or repeatedly visiting a specific page – let you send highly relevant content tailored to their interests. - Date-Based Triggers
Emails tied to dates like birthdays or anniversaries can feel personal and timely. For instance, a birthday email with a special discount can make a subscriber feel appreciated. - Engagement-Based Triggers
Use these to re-engage inactive subscribers or reward your most active ones. For example, you could send a special offer to those who haven’t opened an email in a while.
How to Configure Entry Points
Modern email platforms make setting up triggers surprisingly simple. If you know what action you want to track, the rest is usually just a few clicks.
Start by mapping your customer journey to identify key moments of engagement. For instance, if you run an online course, these moments might include signing up, purchasing a course, completing a lesson, or becoming inactive.
Once you’ve identified these moments, head to the Automation section of your email platform. Choose the trigger you want – like a signup or a specific behavior – and configure it. Many platforms offer a visual workflow builder where you can set up your sequence starting with "When someone…" or "Trigger."
- Form-Based Triggers
These are often the easiest to set up. For example, in Mailchimp, you can select "Signup" as the trigger and link it to a specific form or audience list. - Behavioral Triggers
For actions like abandoned carts, make sure your email platform integrates with your e-commerce store. Platforms like Shopify or WooCommerce often have built-in options to send emails based on behaviors like "Cart abandoned for 1 hour" or "Purchase amount exceeds $100." - Time-Based Triggers
These let you delay emails after a trigger. For example, a welcome email might go out immediately, while a post-purchase review request could wait a few days to give customers time to use the product.
If you’re setting up multiple triggers for the same sequence, focus on the most common subscriber actions first. This way, you can capture the majority of your audience before adding triggers for less frequent actions.
Test and Optimize
Before going live, test each trigger by performing the action yourself – whether it’s signing up with a test email or simulating an abandoned cart. This ensures everything is working as planned. Most platforms also allow you to set multiple entry points for a single email sequence. For example, you can combine newsletter signups and lead magnet downloads into one streamlined welcome series, saving you time and effort.
Finally, define a clear goal for each sequence, whether it’s welcoming new subscribers, recovering lost sales, or nurturing leads. Knowing your objective helps you choose the right triggers and avoid unnecessary complexity in your automation setup.
Once your triggers are in place and tested, you’re ready to design your email flow and schedule the perfect send times.
Step 3: Plan Your Email Flow and Timing
Now that you’ve set your triggers, it’s time to craft a sequence that feels like a natural conversation. Think of it as a story unfolding with each email – every message builds on the last, gently guiding your subscriber toward a specific goal. This step is all about finding the right balance: delivering value while steering your audience toward the action you want them to take.
A well-thought-out flow feels seamless to your subscribers, but behind the scenes, it requires careful planning. Each email should offer something useful while keeping them engaged and moving forward.
How to Map Out the Sequence Structure
Your email flow should align with the triggers you’ve already set up to create a smooth and cohesive journey. Start by working backward from your ultimate goal. Ask yourself: What do my subscribers need to know to make a decision? What concerns might they have that I need to address?
Here are a few common sequence structures to consider:
- Welcome Series: This is a great starting point for most businesses. Kick things off with a friendly welcome email that confirms what your subscriber signed up for and sets expectations. Follow up with 2-3 emails that provide quick wins – like helpful tips, resources, or behind-the-scenes insights. Wrap up with a light introduction to your product or service.
- E-commerce Sequences: Tailor these to the customer journey. Start with emails that educate subscribers about your products, sprinkle in some social proof like reviews or testimonials, address any potential objections, and then present your offer.
- Lead Nurturing Sequences: Focus on building trust and showcasing expertise. Share case studies, industry insights, or tutorials in your early emails, gradually positioning your product or service as the perfect solution to the challenges you’ve been discussing.
The key is to keep each sequence focused on one specific goal. For example, a welcome series might aim to build brand awareness and engagement, while an abandoned cart sequence should zero in on getting customers to complete their purchase. Trying to cram too much into one sequence can overwhelm your audience and hurt your conversion rates.
Most effective sequences include 3-7 emails. If you have multiple goals, it’s better to create separate sequences rather than overloading a single one.
Once you’ve mapped out your sequence, the next step is to set a delivery schedule that ensures your emails arrive at the right time.
Setting Timing for Better Engagement
Timing can make or break your email sequence. Send emails too frequently, and your audience might feel overwhelmed. Space them too far apart, and they might lose interest or forget about you entirely.
Here’s how to time different types of sequences for maximum impact:
- Welcome Sequences: Timing is critical here since your audience is most engaged right after they sign up. Send the first email immediately, follow up with the second within 1-2 days, and space subsequent emails 2-3 days apart to maintain momentum.
- Educational Sequences: These work best with slightly longer gaps. Aim to space emails 3-5 days apart to give your audience time to absorb and act on your advice. If you’re offering weekly tips, stick to a consistent schedule so subscribers know when to expect your emails.
- Sales Sequences: Start with emails that deliver value, then gradually increase frequency as you approach your offer. For example, you might send emails on days 1, 3, 6, and 8, with the final email featuring your strongest call-to-action.
- Abandoned Cart Emails: Timing here is all about urgency. Send the first reminder within 1-3 hours of the abandoned cart, follow up after 24 hours, and send a final email 3-7 days later. Adding an incentive, like free shipping, in the last email can help seal the deal.
Consider your audience’s habits when setting your schedule. For instance, B2B subscribers often check emails during business hours, while B2C audiences might be more active in the evenings or on weekends. Keep in mind that automated emails are triggered by actions, so they naturally perform differently from broadcast emails.
Once your sequence is live, use your email platform’s analytics to test and refine your timing. Look at when subscribers are most likely to open and click your emails, and adjust your schedule accordingly.
Remember, timing isn’t just about the intervals between emails – it’s also about the flow of the sequence. Each email should feel like a logical continuation of the last. For example, if email #2 references something from email #1, make sure there’s enough time for subscribers to have read the first email before the second one lands in their inbox.
Finally, consider adding flexibility for different subscriber behaviors. Someone who clicks every link might be ready for your offer sooner than someone who only opens a few emails. Advanced tools can adjust timing based on engagement, but even basic sequences benefit from thoughtful pacing that respects your audience’s time and attention.
With your email flow and timing nailed down, you’re ready to dive into writing the content that will bring your sequence to life.
sbb-itb-4bfa3ba
Step 4: Write Email Content That Works
Now that your triggers and timing are set, the next step is crafting emails that not only grab attention but also inspire action. The goal? To create messages that resonate with your audience, build connections, and drive results. To do this effectively, focus on clarity, delivering value, and encouraging readers to take the next step.
When writing email content, remember that your subscribers are real people leading busy lives. They skim their inboxes quickly, deciding in seconds whether to open an email. Make that decision easy by delivering exactly what you promised when they signed up. From there, it’s all about crafting a message that turns interest into action.
How to Write Emails That Convert
A high-converting email starts with a subject line that grabs attention and sets clear expectations. Skip the generic or overly pushy phrases like "Newsletter #3" or "URGENT: Buy Now!" Instead, focus on offering value or sparking curiosity. For instance, a welcome email could use subject lines like "Your free guide is here (plus a quick question)" or "Welcome! Here’s what’s next." An educational email might say, "The mistake everyone makes with [topic]" or "3 things that changed everything for me." Think of your subject line as a friendly invitation, not a hard sell.
Next, tailor your message to match where your subscribers are in their journey. New signups may need a warm welcome and an introduction to your brand, while long-time readers might appreciate more advanced tips or exclusive offers. Use any available data – like their interests or actions they’ve taken – to make your emails more relevant.
When it comes to the body of your email, deliver on the promise made in your subject line right away. Start with a friendly greeting, then dive straight into the valuable content – whether it’s a quick tip, a personal story, or actionable advice. Keep paragraphs short (two to three sentences max) since many people read emails on their phones. Use bold text to highlight key points and leave plenty of white space to make your message easy to scan.
Your call-to-action (CTA) is where conversions happen. Be specific with phrases like "Download Your Free Template", "Shop the Sale", or "Reserve Your Spot." Avoid vague options like "Learn More" or "Click Here", which don’t clearly communicate what readers will get. Display your CTAs as buttons to make them stand out, especially on mobile devices.
Creating urgency can also boost conversions. Use time-sensitive language like "Your cart expires in 24 hours" or "Early bird pricing ends Friday" to encourage immediate action. Just make sure any urgency is genuine – fake scarcity can damage trust.
Offering immediate value or incentives can further motivate readers. Think discount codes, free shipping, or exclusive early access.
For example, Loftie, an eCommerce brand, effectively used discounts to entice hesitant buyers. They emphasized their CTA button and gave clear instructions on how to claim the offer.
When someone clicks your CTA, ensure they land where they expect. If the button says "Shop Now", it should take them directly to the product page – not a generic homepage. Reducing friction between the click and the desired action makes a big difference.
Finally, don’t skip A/B testing your CTAs. Experiment with different button colors, text, placement, and offers to see what resonates most with your audience. If your click-through rate is low, try testing alternatives to uncover what works better.
Addressing objections or concerns in your email can also make a big impact. For example, if you’re selling a product, mention your return policy. If you’re asking for a time commitment, explain why it’s worth it. Transparency builds trust, making your CTAs even more effective.
Once your email content is polished, you can save time and maintain consistency by using pre-built templates.
Using Pre-Built Templates to Save Time
Most email platforms offer ready-made templates designed to save time and improve results. These templates not only make your emails look professional but also follow layouts proven to drive conversions. Choose a template that fits the purpose of your email – whether it’s a clean, welcoming design for new subscribers, a product-focused layout for sales, or an easy-to-read format for educational content.
When customizing a template, start by incorporating your brand’s colors, fonts, and logo to ensure consistency. While templates provide a strong foundation, don’t hesitate to tweak them. Rearrange sections, add your unique style, and make adjustments to reflect your brand’s personality.
Templates often include content suggestions you can adapt to match your voice. Over time, you can build a library of go-to templates that make future campaigns faster and easier to create while maintaining a consistent look and feel.
With your content written, formatted, and optimized, you’re ready to move on to the final touches that will make your email sequence as effective as possible.
Step 5: Set Up Rules and Test Your Sequence
Now that your content and flow are ready, it’s time to add the finishing touches: smart logic and quality control. This step transforms your sequence from a basic email campaign into a dynamic system that responds to subscriber behavior. The goal? Deliver the right message at the right time, elevating the experience for your audience.
Think of this as giving your sequence its "brain" and running a thorough check to ensure everything works perfectly. Investing time here prevents errors and ensures your automation feels polished and professional.
Adding Conditional Logic and Segmentation
Conditional logic turns a simple email sequence into a responsive, tailored system. Instead of sending the same emails to everyone, you can create personalized paths based on subscriber actions – like opening an email, clicking a link, or making a purchase.
Start by using tags to track subscriber behavior. For example, if someone clicks on a beginner tip, you might assign them a "beginner" tag. These tags act as markers, helping you understand interests and behaviors. Most email platforms allow you to automate this process, so once it’s set up, it runs on autopilot.
Behavioral triggers take personalization further. For instance, if a subscriber clicks a link but doesn’t complete a specific action, you can send a follow-up email with more details or an incentive. You can also adjust the frequency of emails based on engagement – more emails for active subscribers and fewer for those less engaged.
Branching paths are another powerful tool. These let you customize the sequence based on subscriber characteristics or actions. For example, a small business owner might receive case studies relevant to their industry, while others get content tailored to their needs. This kind of personalization makes your emails feel relevant and useful.
Don’t forget to set exit conditions to remove subscribers from a sequence once they’ve completed a desired action. For example, if someone makes a purchase, they can leave the sales sequence and move into a customer onboarding sequence. This avoids the awkwardness of pitching a product to someone who’s already bought it.
Most email platforms include visual workflow builders, making it easy to map out your sequence. These tools let you drag and drop decision points, add conditions, and create multiple paths. Start simple with one or two conditions, and build complexity as you become more comfortable.
Once your logic is in place, it’s time to test everything thoroughly.
Testing and Fixing Issues Before Launch
Testing is essential to ensure your sequence runs smoothly. This involves checking both individual emails and the entire sequence in real time.
Start by reviewing how your emails look on both desktop and mobile devices since over 60% of emails are opened on mobile first. Make sure images load correctly, text is easy to read, and formatting holds up on smaller screens.
To test the full sequence, subscribe yourself as a new contact using a separate email address. This lets you experience the journey just like a subscriber would. Go through every step – sign up for the lead magnet, confirm your email (if required), and monitor how emails arrive based on your timing settings.
Review the test subscriber’s profile in your platform to ensure emails are sent, opened, and clicked as expected. Most platforms provide detailed logs to track these interactions. Check every email on multiple devices and click every link to confirm proper redirection.
For sequences with advanced logic, create test leads representing different subscriber types. This allows you to verify how various paths behave. For example, if you’ve set up branching logic, test each branch to ensure contacts are routed correctly.
Keep an eye out for common issues like broken links, formatting problems, or dynamic content that doesn’t populate as expected. Also, test subject lines and content to ensure they’re engaging enough to encourage opens and clicks.
Timing is another critical factor. If emails are sent too frequently, subscribers may feel overwhelmed and unsubscribe. On the flip side, long gaps between emails can lead to disinterest. Adjust the timing during testing to find the right balance.
Use your platform’s analytics tools to review test results. Check how the system tracks subscriber actions and ensures smooth progression through the sequence. This insight will also help when you analyze real subscriber behavior after launch.
Create a simple checklist for testing:
- Verify all links work.
- Confirm personalization fields display correctly.
- Check formatting on mobile devices.
- Test conditional logic paths.
- Review email timing.
Use a unique email address for each test to avoid data confusion and ensure accurate tracking.
If you find any issues during testing, fix them immediately and retest. Remember, launching your sequence is just the start. Regular monitoring and adjustments based on data will keep your automation effective over time. Once you’re confident everything works as planned, activate your sequence and start building meaningful connections with your audience through smart email marketing.
Conclusion: Launch and Monitor Your Automation
You’ve crafted your automated email sequence in just 30 minutes – impressive, right? Now, it’s time to activate it and let it work for you around the clock. This step wraps up everything you’ve done so far, from picking the right platform to designing emails, setting up triggers, and conducting tests. But the journey doesn’t end here. To get the most out of your automation, you’ll need to keep an eye on its performance and fine-tune it over time.
Once live, your sequence will start doing the heavy lifting: nurturing leads, converting subscribers, and driving revenue. It will engage your audience automatically, guiding them through your content and encouraging the actions you’ve designed – all without needing your constant input.
Key Points for a Quick Setup
This 30-minute framework shows that automation doesn’t have to be a drawn-out process. By selecting the right tools, defining clear triggers, mapping out your email flow, and creating engaging content, you’ve built a system that’s ready to deliver results.
Your sequence includes critical features like behavioral triggers that respond to subscriber actions, personalized content tailored to your audience, and conditional logic to ensure the right message reaches the right person at the right time.
With your automation live, the next step is all about refining it for even better performance.
Next Steps to Boost Results
Launching your sequence is a great milestone, but the real magic happens when you start optimizing. Keep a close watch on key metrics like open rates, click-through rates, and conversions to understand how your audience interacts with your emails. Don’t ignore unsubscribe rates – if they spike, it might mean your messaging isn’t hitting the mark or that you’re emailing too often.
A/B testing is your best friend for making improvements. Experiment with subject lines, email copy, calls to action, and timing to find out what resonates most with your audience. Even small tweaks can lead to noticeable gains.
Pay attention to underperforming emails in your sequence. If certain emails have low open rates, try reworking the subject lines or refreshing the content. If your calls to action aren’t driving engagement, test alternative wording or offers to see what clicks – literally.
Make it a habit to review your sequence’s performance monthly. Use the data to make smart adjustments that keep your automation effective and aligned with your audience’s needs. That 30-minute setup you invested in? It’s just the beginning of a system that can grow with your business and deliver value for years to come.
FAQs
What should I consider when choosing between Mailchimp, ActiveCampaign, and ConvertKit for automated email sequences?
When choosing an email automation platform like Mailchimp, ActiveCampaign, or ConvertKit, it’s essential to align your decision with your specific needs and goals. Each platform is tailored to serve different types of users, so understanding their strengths can help you make the right choice.
- Mailchimp is a solid option for beginners and small businesses. With its user-friendly interface and a variety of templates, it’s perfect for those who want a simple, quick setup without a steep learning curve.
- ActiveCampaign is ideal for those who need advanced tools. Its robust automation capabilities and CRM features make it great for businesses looking for detailed audience segmentation and comprehensive analytics.
- ConvertKit caters to creators like bloggers and content marketers. It offers straightforward automation tools and tagging features, making it easier to build personal connections with your audience.
When deciding, consider factors like usability, cost, scalability, and the audience you aim to reach. These will guide you toward a platform that fits your business best.
How can I keep my email sequences effective as my subscriber list grows?
To keep your email campaigns effective as your subscriber list grows from 100 to 10,000, it’s crucial to focus on personalization, segmentation, and optimization. These strategies ensure your emails stay relevant and engaging, no matter how large your audience becomes.
- Personalization: Use dynamic fields to address subscribers by name and customize content based on their preferences or actions. This adds a personal touch, making your emails feel less generic – even at scale.
- Segmentation: Break your subscriber list into smaller groups based on factors like purchase history, engagement, or interests. With targeted emails, you can connect with each segment more effectively, boosting engagement and conversions.
- Optimization: Keep an eye on performance metrics like open rates and click-through rates. Experiment with subject lines, send times, and content styles to figure out what resonates most with your audience.
By putting these strategies into practice, you can grow your email campaigns without losing the personal connection that keeps subscribers engaged.
What mistakes should I avoid when creating content for automated email sequences?
When creating content for automated email sequences, there are a few missteps you’ll want to steer clear of to keep your audience engaged and your emails effective.
First, steer away from making your emails feel generic. Personalization is the secret sauce for connecting with your readers. Use their names, mention their interests, and tailor the content so it feels like it’s written just for them.
Second, don’t bombard readers with lengthy emails or overload them with information. Keep your messages short, engaging, and laser-focused on one clear goal or call-to-action. A concise email is far more likely to grab attention and prompt action.
Finally, don’t skip the testing phase. Test your email sequences thoroughly to ensure links are functional, formatting looks great on all devices, and the timing aligns with when your audience is most likely to engage.
By avoiding these common mistakes, you’ll be on your way to crafting email sequences that truly connect and deliver results.